There are the basic out of the box MFA options that work perfectly fine in an Office365/Azure Environment. Personally, though I do not like that SMS is even an option that the user can select but that is neither here nor there. And is a choice that is up to the companies “higher ups” anyways.
For those of you unfamiliar with setting a user account up with MFA I will detail the general steps of turning it on next, and then cover some “refinement” options that can help you choose how your environment’s MFA system will look and operate.
_____________________________________________________________________________
Turning on MFA for an Azure User
Before I begin, I have one caveat to note. You can turn on MFA either per user or for the entire environment. Obviously, the entire environment is going to be more secure Since everyone will be forced to use MFA. But for some specific reasons my environment is setup using per user MFA so I will be covering that.
Step 1:
First login in with you administrator account to the Azure Admin Portal… https://aad.portal.azure.com/
Step 2:
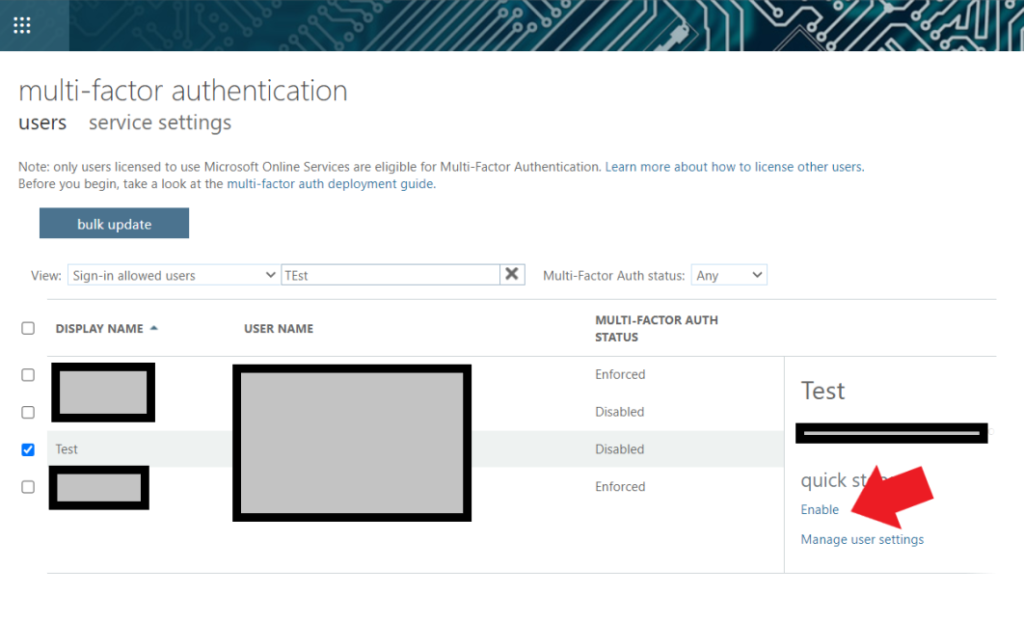
Once signed in go to users, and then select the “Per-user MFA” option…

Step 3:
In the new window, select the magnifying glass and search for the user you want to turn on MFA for…

Step 4:
Select the user and then select “Enabled”

_____________________________________________________________________________
MFA “Refinement” Options
There are a couple different things you can change about how MFA works inside of Azure AD (if you have the right license of course). I am going to highlight a couple of the better ones below.
– Require Number Matching for Push Notifications
If you enable “Require number matching for push notifications” the user will have to type in the number they see on screen of their computer. This is a much better option in my opinion then simply allowing push notifications to just be a YES or NO option. This is because of something called MFA Fatigue Attacks. Which are when hackers trigger multiple MFA alerts in hopes of having an end user accidentally allow them past this level of security.
To configure this option, go to Azure Portal > Azure Active Directory > Security > Authentication Methods > click on Microsoft Authenticator > configure tab.

The notification on the End user’s phone will look like this…

– Show Application name in Push and Passwordless Notifications
Showing the application name that a notification is coming from, can help users potentially catch if a request is illegitimate. If a user is signing into Outlook the same time a hacker is trying to modify their security settings, they may get the attackers MFA request first, and thinking its them signing into Outlook, accept it. The get the second notification that was the real one and think it was a glitch and ignore it.
To configure this option, you can go to the same spot as the Number Matching Configuration. Go to Azure Portal > Azure Active Directory > Security > Authentication Methods > click on Microsoft Authenticator > Configure tab.
When you have this option setup your push notifications will look like the below…

– Show Geographic Location in Push and Passwordless Notifications
The last option is to include geographic location in notifications. This option might be one you want to not enable if your users do alot with AVD, VPNs or Remote Desktop like my Environment does. This is because the Location might be drastically different then the users actual location.
IF you want to configure this option, go to Azure Portal > Azure Active Directory > Security > Authentication Methods > click on Microsoft Authenticator > configure tab.
Notification with this option look like the following…

If you enable all three of the above options your notifications will actually convey alot of detail like below..

– Fraud Alerts
The last option is one that I am not using this in my environment, but is an extremely nice option to have. Fraud Alerts allow your users to report fraud if they receive a two-step verification request that they didn’t initiate, this then blocks their account from sign-on.
Go to the Azure Portal and launch Azure Active Directory > Security > Multi-Factor Authentication > Fraud Alert. (Note that this option does require an Azure AD Premium P2 License)
Inside of the Fraud Alerts you can also configure if users will automatically be blocked from signing in if they submit an alert. If a user is blocked, you can unlock them in the Block/unblock user’s window.

When end-users submit fraud alerts, they will be notified about the account lockout.